Showing posts with label Fab Lab. Show all posts

Saturday, January 25, 2025

Fabrication Lab: Perfecting the Craft

Between ice hockey, Lego's, portable radio operations and my job at The University of Chicago that makes all this possible, you may have forgotten that I maintain a 3D printing hobby. I have a whole section of my blog, "Fabrication Lab" dedicated to it. So, I thought I'd write a post returning to my 3D printing hobby. 

My latest adventure in 3D printing was not so much about the models and prints themselves, but fine-tuning my printer. I had a problem, a small problem, but a problem none-the-less: My prints had lines in them. They printed successfully, but they were imperfect. They had lines of filament that were skipped, meaning that there were visible imperfections in the final product. 

The top two boats have "lines". The bottom one is perfect.
For weeks, I couldn't figure out the problem. I tried making a cool looking Tiki mug for my friend, but it kept coming out of the printer with lines. In other words, it wasn't as nice looking as it could have been. I finally gave my buddy his imperfect Tiki mug, and while he still loved it, I felt bad because I knew a Creality K1 Max should print better than the product I was able to give. And, if it were something more than a Tiki mug, I wouldn't want flaws in the filament layout... especially if it was a load-baring object. 

I took some time over winter break to experiment with my printer. I didn't know what was causing the lines (imperfections). I tired adjusting a number of variables: I used different filaments (from PLA to ABS) , I tried heating the build plate (from 50 degrees Celsius to 80, and then to 100 degrees), and I also replaced the 0.4 millimeter nozzle on my K1 Max. Nothing helped, regardless of the temperature or settings I adjusted, the prints were coming out imperfect.        

The nice thing about having a Creality printer, though, is that they have an open-sourced plan, with easily replaceable parts. I was at my wits' end, and I didn't want to cut open a $1,000 dollar machine and risk breaking it... But what good is a printer that can't print perfectly? 

I logged on to YouTube, and watched some helpful tutorials on how to replace the extruder for the K1 Max. It turns out, it was easier than I thought. You need to be very careful to keep each piece, and document the deconstruction so you know how to put it all back together. However, outside of that, it's basically just a matter of following directions. 

When I dissembled the extruder, I found the problem. The gears that pull the filament into the heater and then lay them onto the build plate had a flaw. Some of the claws in the gears were worn down. I believe it happened when I used a metal wire to force out a filament clog. I fixed the clog, but in doing so I damaged the gears. Each time the gears and filament met at the damaged part, the K1 stopped extruding. It still made the full prints, but those prints had visible lines where the material was not laid down. Those tiny imperfections in the extruder gears led to tiny imperfections in the final prints.        

Luckily, I had a Creatily printer which (at least for now) supports tons of parts, modifications, and third-party enhancements. I bought myself a completely new extruder with good gears for 26 dollars on Amazon. There were plenty of YouTube videos to help me complete the installation, and it was mostly painless. 

The most important thing is that I was able to get my K1 Max (which I have a lot of money invested in) printing perfectly again. All it took was a replacement part costing 26 dollars, and some workshop tools like a screw driver.      

The Creality K1 Max

All in all, it ended up being a fun and engaging experience. While I would've wished my K1 kept printing perfectly without any repair needed, it didn't. I used the opportunity to figure out how to repair her! 

It did cost a little bit of money, but 26 bucks is nothing compared to buying a whole new printer: a K1 or any other brand. I also believe this speaks to Creality's commitment to the "open-source" model. Creality printers let us users use any software we'd like, and open their own equipment up to third-party replacement parts. So, us consumers can keep our equipment, design our prints, and (importantly) repair our own machines at a reasonable cost, with Creality parts or with third-party parts. 

MicroSwiss, for example, is an excellent third party part-maker for 3D printing. And they have parts that work with both my Ender 3 and K1 Max. While Creality provides quality replacement parts themselves, I'm glad their machines are compatible with other firms' products. It's truly good for the industry, and for hobbyists like myself!    

Tuesday, August 27, 2024

Fabrication Lab: Designing & Printing HAM Radio Accessories

When I first began printing I was happy to download and print existing 3D models, but my ultimate goal was always to design my own. The problem was, I didn't have any idea what I wanted to design. But that changed this summer when my HAM radio station (KD9ZDY) started growing bigger and more sophisticated. Suddenly, I needed storage for radio equipment, brackets for radios, cable management devices, antenna structures, temperature management devices and other little things all unique to my own set-up. My two seemingly different hobbies began to merge and dovetailed to great effect!

For many HAM radio enthusiasts, part of the fun is designing and building rigs and kits; whether it's a mobile transceiver perfectly tucked under the dash of their car, a weather-proof travel box for POTA (Parks On The Air) excursions or the perfect low-profile antenna for a basement apartment with a stingy landlord, HAM operators are nothing if not creative and resourceful. I discovered my first opportunity for design work while looking for a mounting bracket online for my ICOM-2730 radio. The accessories available online were just too expensive, so I decided to design my own bracket to neatly connect the head and control panel to the radio body, and mount to put the radio neatly in place on my shelf.

Before this past year my only experience was using SelfCad Pro to add detailing to a mostly-created 3D image. The process was difficult and time consuming, and for the most part I didn't have many ideas for what to design on my own. Most of the things I enjoyed printing, ancient landmarks, Star Trek ships, car and aircraft models were already designed and available to print -often for free. So paying for SelfCad Pro at $14.99 per month just wasn't worth investment. Though the free trial was useful in learning a bit more about pre-slice design work. 

My design on Rhino 8
When I ventured back into CAD design, I decided rather than paying a monthly fee for SelfCad Pro, I wanted to go with software I could buy once and use forever. I settled on trying Rhinoceros' Rhino 8 software, since it had good reviews online from 3D print designers and offered a 90 day full trial with all features available. I watched some YouTube videos, and got started making my radio brackets. The multi-part Rhino Essentials videos are particularly helpful. While slow at first, they do a wonderful job explaining basic layout and terminology for someone with absolutely zero experience in CAD. After the end of video 2, I had basically all the knowledge I needed to make the basic shapes of my bracket and shelf, and printed my design. In total, from start to finish, it took about 4-6 hours measuring, watching and re-watching the 15-minute videos, and drafting the design on Rhino 8 to get the hang of the software. While I still had a lot to learn, this experience was enough to convince me to purchase the full license for Rhino 8. The free online learning content, and common CAD terminology offered by Rhino were also selling points. As a novice designer it was good to know I had a wealth of instructions as well as an interface that uses similar logic as other CAD programs. I felt Rhino 8 was worth the investment, should I
need to use another program or even go into the design or manufacturing field professionally one day.  

So far, my investment has paid off. Not only do I have a bracket and mount for my ICOM radio, I also have a storage box perfectly sized for my NanoVNA network analyzer, a dummy load, and various coaxial adapters and a mini ARRL logbook -all must-have HAM accessories.  

Custom cooling tray in-use
Most notably, I created a cooling tray for my RTL-SDR USB dongle, featured in this article. This design serves two purposes: 1.) it keeps the dongle plugged into my laptop (because it always fell out), and 2.) I has a fan to cool it down (because it got so darn hot while running). Since the cooling tray design may be useful for others with the RTL-SDR or similar devices, I decided to make it my first publicly available print. You can find it today on Cults 3D or Creality Cloud. It's free, and available to all, to download or adapt as desired.  

As I continue with both my amateur radio and CAD/3D printing hobbies, I should have plenty more opportunities to design new and useful tools and devices. While I can always use more storage and cable management in the HAM shack, I may venture into mobile radio and take part in POTA events as well as field days in future, and I can already think of different shapes and designs that will help in packing equipment, and setting up a mobile HF station/antenna. HAM equipment is expensive as it is, and accessories, even for storage, can be an additional financial burden and may not fit my set-up exactly how I want it. So, I'll absolutely continue working with Rhino 8 and my Creality printers to create and test new equipment as the need arises. I may even create something others will find useful as well!

Saturday, August 3, 2024

Fabrication Lab: An Honest Review of the Printers

In my last article, I mentioned that I would review my current and past printers: The Creality K1 Max, The Ender 3 and the Sermoon V1, all Creality brand printers. 3D printing is relatively new and it attracts a user-base of passionate individual hobbyists who spend their own hard-earned dough. So, there's a lot of controversy regarding which brands do what best. So, I wanted to provide the best consumer information based on my experiences. 

I initially got interested in 3D printing in 2021 when I saw some printers running at Kent State University's Design Innovation Hub where students and local residents can access public equipment. Later that year, I looked on Amazon for 3D printer prices and found that they were far less expensive than I thought. I decided, based on my income, I could afford something between 200 and 400 dollars, and with little experience, I settled on two possible options a Flashforge printer and Creality's Sermoon V1. The draw of both of these printers were that they were enclosed, they promoted being able to print multiple materials (beyond PLA plastic) and they promoted some level of "out-of-the-box" printing with auto-leveling, which was said to make the process easier. These two models were also marked down roughly 75 dollars during a temporary promotion. Ultimately, the choice was made for me when the Flashforge arrived either damaged or faulty, and I had it sent back. After I got my refund, I chose the Creality Sermoon V1 because it was still on sale while the Flashforge model was no longer available at the cheaper price. So basically, that's how I started out with a Creality printer. I'm sure, if I were to re-order a working version of the Flashforge, it would have been fine, but I never had the chance. I will say the return process for Flashforge was painless, and I had my refund in less than a week. 

Working with the Sermoon V1, I found that while it worked as well as I could hope, it also lacked in certain areas. First it was not at all a "print out-of-the box" printer, and it did not auto-level. What it do was allow you to micro-step each corner of the printing bed with a button on the controller display. So, it took just as long as hand-turning a tension knob to level the bed. Plus, being totally new to the hobby, I had not yet learned how to download files, slice them and use the appropriate settings to make sure over-hangs were properly supported and and my models were well-adhered to the build plate. For about two months, at least half of my model attempts were failing in some way or another -even the samples pre-programmed onto the operating system. Additionally, my first few attempts at printing in the more stable ABS plastic were not good. First off, the odor of the ABS plastic (at build temperature) easily permeated the Sermoon's enclosure; secondly the printer just didn't seem to handle ABS well at all. Even at the appropriate temperature, ABS caused problems with clogging in the nozzle. Eventually, I got the hang of using my Sermoon V1, but in hindsight it was clear that some some of the "extras" it advertised as a step-up from other printers weren't all that great. I continued to stick with the Sermoon for a good 3 years working mostly with PLA plastic, since I primarily made indoor models and toys, for which a better material was not necessary. With the benefit of experience, I became a lot more successful, but I also knew what to look for in a upgrade when the time came. 

In spite of my early troubles with the Creality Sermoon, I did choose to continue with the Creality brand when I bought a new printer. I was familiar with their slicing software, and they offer not only lots of models, but replacement parts. They also supported more third-party replacement parts than any other brand I was familiar with. So, things like nozzles, extruders, hot-ends and build plates could be replaced if they were to fail in the long-term. Ultimately, this was why I stuck with Creality. In a new industry, I was confident their products would continue to be made, and parts would continue to be made for them, either by Creality themself or a third-party manufacturer.

My next choice was the Creality K1 Max. It was about twice as expensive as my original Sermoon, but it advertised exactly what I wanted in a upgrade. A large 300x300 millimeter build space, true auto-leveling, an internal camera, WiFi-capable over-network printing, one of the highest varieties of supported printing materials, and really fast printing speed. When I purchased it, I was not at all disappointed. If there ever was a print out-of-the-box system, this was it. It came pretty much built; all I needed to do was set it down, add the filament and, boom, it was already printing one of it's pre-programmed models. It look me about 8-16 hours of following instructions, and making adjustments before I got my previous printer going, and the K1 Max was printing in minutes. On average, it prints at least three times faster than than the old one, with no loss in quality. Not to mention, it really does level itself! After about six months, I've had zero issues that were not due to my own mistakes in slicing.   

If there is one area where the K1 Max falls short, it may be its advertised "Artificial Intelligence," LiDAR detection. While I do engage the optional AI settings, I'm still not sure what benefit it brings over modelling without the AI. At best, it does a test pattern, makes the first level of your print, and scans the LiDAR over it to make sure it's not faulty in some way, before moving forward. If an issue is detected the printer pauses, and allows the user to fix and move ahead or cancel the print. But, I don't think that high-tech feature is any more effective than just watching the print and cancelling it, if it's bad for some reason. Honestly, I think Creality may be trying to capitalize a bit on the "Artificial Intelligence" craze, when in reality it's just offering the same machine logic used in manufacturing for decades. 

That said, the speed and build space alone make it worth the effort. Plus all the K1's offer a robust enclosure with 3 ventilation fans, and filtering material in the box fans that genuinely cut down on the odor from ABS plastic builds. For me, the K1 Max has met my expectations for a high-end printer. 

However, perhaps my most interesting diversion was not an upgrade at all but a downgrade, to the Creality Ender 3. At just around 160 bucks, I thought I'd give it a try. Needless to say, having started with a 400 dollar printer and moving to a nearly 1000 dollar printer, I did not have high expectations for the 160 dollar Ender 3. And, it definitely proved to be a demanding and difficult, if not enlightening, process getting started. The neat part about the Ender brand, is that it's parts are all open-source and standardized, meaning that while the starter printer is really in-expensive, you've got endless options to upgrade and customize it with multiple competing third-party vendors. While it's got an introductory price, it's not a printer for the inexperienced, but rather a base-model for experience printers who want to tinker and upgrade their set-up. (At least that's how I see it). The open-source nature of the product ensures cheap replacement parts will always be available as well. 

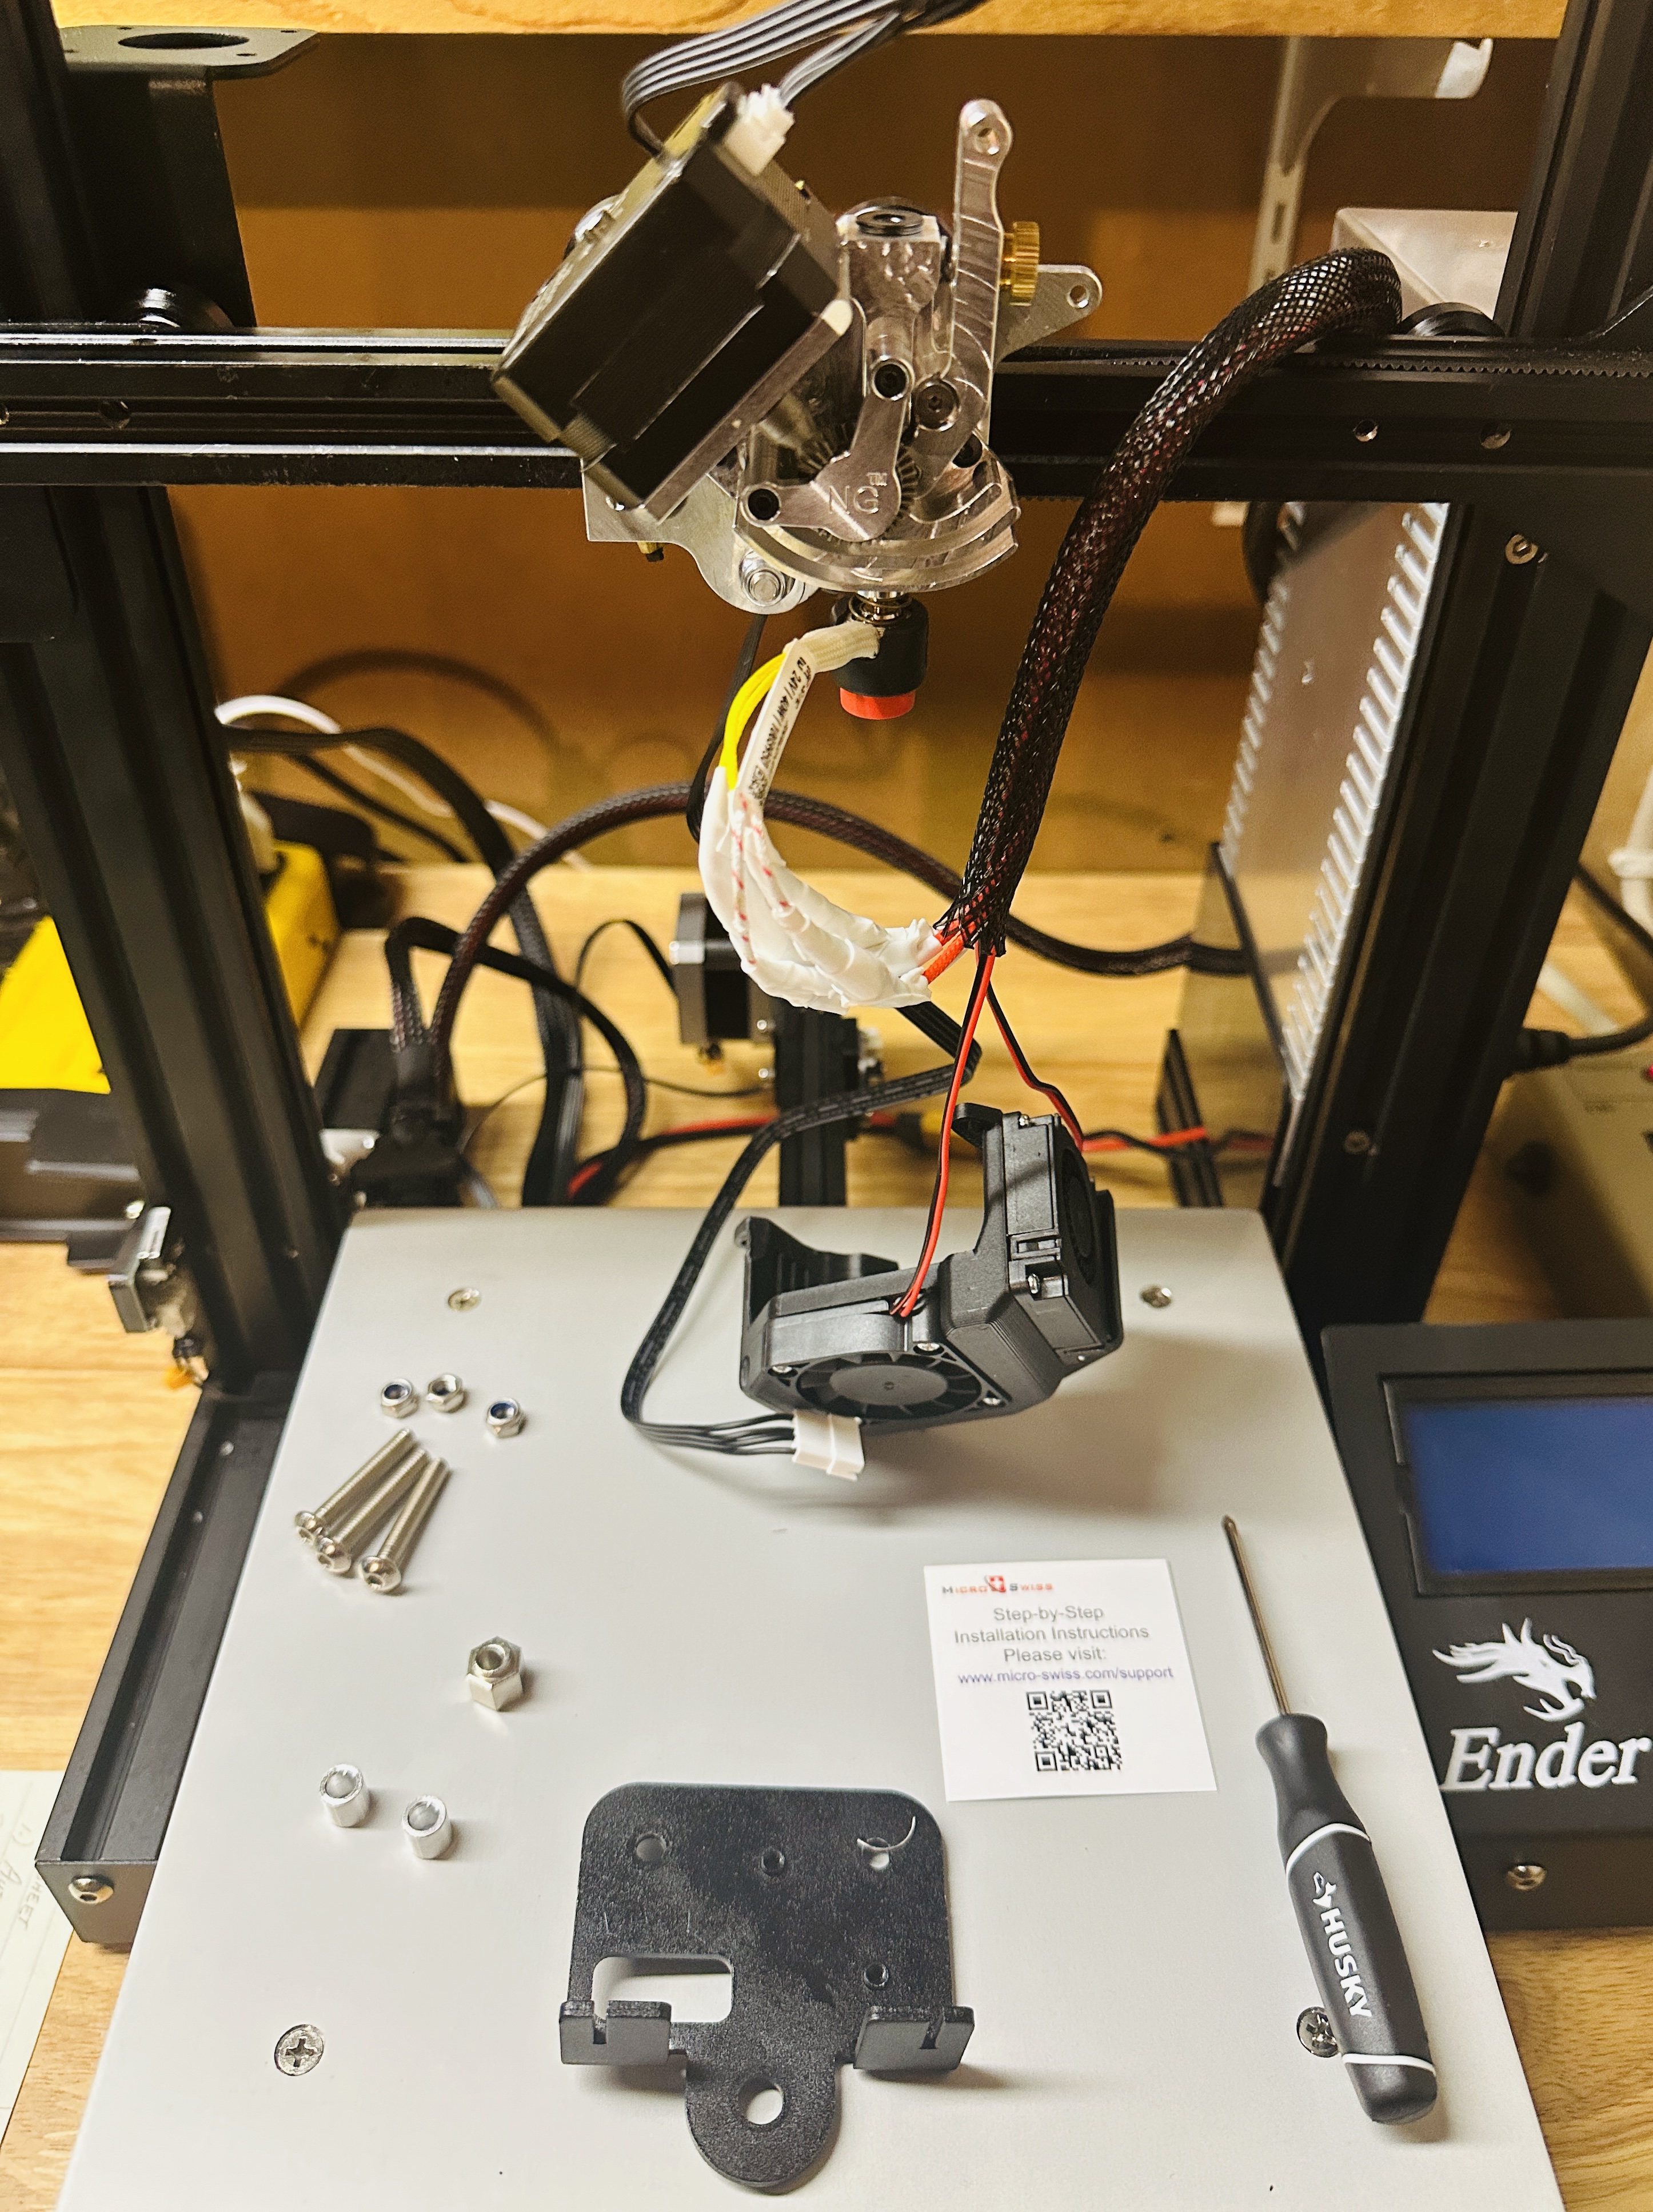
After making a few successful prints on the Ender 3, it was clear to me that this was more of a learning project than anything. The K1 Max was so dependable and fast that it would be pointless using the Ender 3 as anything other than an experimental unit -something I could use for learning. For my first "experiment" I replaced the stock extruder and filament feeder with a MicroSwiss REVO NG "Direct Drive" extruder, which was about 150 dollars. The MicroSwiss upgrade allows the Ender 3 to print more materials including ABS, replaces the clunky gear-catch filament feeder, and makes switching filaments a breeze. Replacing the existing extruder was a fun challenge, I had to be comfortable with cutting, stripping, soldering and crimping wires (a skill I initially learned setting up my first VHF/UHF radio station), and also be able to dis-assemble and re-assemble the machine. It worked great, and I felt like McGuyver playing with all those tools. Also, the MicroSwiss extruder was a huge benefit as well. My Ender 3 could now print multiple new materials types, but it also made replacing filaments so much easier, cutting out half of the re-loading process from the original set up. It also heats up faster as well, turning five to ten minutes of wait-time into about two. With a 150 dollar investment and some extra work, I turned a 160 dollar Ender 3 into a printer that rivals those in the 400 to 500 dollar range. Also, as an enthusiast in the hobby, I just enjoy seeing it run!

As I mentioned before, the hobby has it's share of controversy, and Creality take it's share of criticism. The major criticism is that their customer support and maintenance service is lacking. I don't disagree, it's a huge company based in China, so getting assistance from a human being in real-time is difficult, if not impossible. You notice this immediately when opening their products. Compared to well-known US-based consumer appliances, and even a lot of foreign brands, who typically provide a good amount of user literature, Creality basically just had a QR code, or instructions to find a website and look up the product you just bought for basic set-up instructions. With so many different product lines and brands, it can be difficult to find the correct model. Did I buy the "Creality CR-10," "CR-10 Smart" or "SR-10 SE," or did I get the "Ender 3" or" Ender 3 Version 3?" yes, those are all different actual printers. I've found that random Youtubers have created better tutorials in their garages, than Creality produces on its own. 

Another criticism is that Creality's quality control is inconsistent at best, allowing flawed broken products to be sent out far more often than established appliance brands would. Fortunately, I haven't had this problem with any of my Creality printers. And my experience with Flashforge suggests it may be an issue with 3D printers in-general, rather than something specific to Creality. However, while customer support may be lacking, you should always be able to send a new product back as Creality offers a 90 day no-questions-asked return policy through Amazon as well as other retailers. So, if you do get a flawed product, or are just unhappy with it, you can re-box it and send it back with no risk. This put my mind at easy after hearing some users reporting critical issues with some K1 Max models. While it may be difficult getting in touch with a person at Creality to ask a question, it is at least easy to send the whole product back if you're not happy with it. So, these are all things to consider if you're looking into one of Creality's printers.

In summary, I'm sure there are some brands to avoid when purchasing 3D printers, but Creality is an industry leader for a reason. In general, the lesson I learned with Creality 3D printers is that you don't pay for the quality of prints necessarily, you pay for faster, easier printing at the same quality level. In other words, a less expensive printer won't necessarily create bad prints, it will just take more time and effort to make the same product that a more expensive printer does. Additionally while Creality may lack in customer service and quality control, they offer a 90-day return policy, so be diligent in your first few weeks with a Creality. If it's not working properly, too much of a hassle to get working properly (or you just decide you don't want it) send it back for a refund.  

For more information on my printers and stories about my hobby, check out the "3D printing"and "Fab Lab" tabs to the right.

Sunday, July 21, 2024

Introducing the Cubical Ruins Fabrication Lab!

Now that I'm up and running at my new "home-base," I thought I'd introduce the "Fabrication Lab," a new section for the CR blog. Inspired by the versatile "fabricator" from the Subnautica game, or the "replicators" of Star Trek, the Fabrication Lab will focus on my 3D printing hobby, and other ways to create things... from stuff.

If you've been reading The Ruins lately, you might think I'd put my 3D printing hobby on hold, since I've been focusing exclusively on amateur radio. But, not only have I still been printing, I've made some significant investments in my set-up. Seizing on the opportunity to work from home full time, I finally gave-up the lease on my city apartment of the past nine years -as much as I loved it- and moved to a more spacious home (station, outpost, lair etc). Here, I have a basement workshop to set-up my lab. And, I used the space to replace my old Sermoon V1 with two awesome, but very different, printers: The Creality K1 Max, the high-end workhorse, and The Creality Ender 3, a different thing entirely.

I cannot stress enough how different these two printers, the K1 Max on the higher-end of the newest crop of 3D printers, and the Ender 3 being one of the cheapest printers available, and rapidly becoming outdated. However, working with both of these machines, as well as engaging with the greater 3D printing community online, I've learned a lot and boosted my skill and expertise to the next level.

If you recall from my previous articles on 3D printing, I basically stuck to making toys and cool models, and doing very little with the slicing software other than scaling, splitting and adding details to existing models and .stl files. Yes, I could adjust the supports and adhesion when necessary, but I mostly stuck with the recommended factory settings. After I moved, and my Sermoon V1 broke down, I started browsing the Reddit 3D printing communities, and noticed just what a wide range of print-qualities, and styles, were actually out there. I had assumed things like layer-lines, seams, and bumpy or grainy prints were standard, but even the basic store-brand slicing software has a lot of options to mitigate, or even totally hide some of the tell-tale signs of 3D printing, making a model look like it was cut strait from marble. 

Leveling has always been important, as I first found out, but temperature, print speed, material selection, and even the texture and cleanliness of your build plate can have a drastic impact on the quality of your print. Having two printers, one of which prints up to 10 times faster than my old one, makes it much easier to test new settings. Seeing and tweaking the print settings on my models makes a difference between one test print and the next. Without going into everything, I'll detail the major aspects of what I learned below...

Printer Quality Simply put, the higher the quality of your printer, the better your models will look with less effort. That doesn't mean a less expensive printer won't create beautiful, professional quality models, just that the cheaper models require more work and time from the user to achieve the same result.

The Creality K1 Max, which retails for about $800 USD, is one of Creality's best printers, and it's light years ahead of my other printers. Of course, the trade-off is that it costs twice as much as the other two combined. It supports just about every material type for stereolithography (SLA) printing, and as long as the temperature settings are correct, it will produce quality-looking prints for each. This, compared to the Ender 3, which only supports PLA filament out-of-the-box, and my previous Sermoon V1, which supports PLA and ABS (but seemed to clog and fail repeatedly when using the more robust ABS plastic). Most notably the K1 Max prints way faster, with no loss in quality. It also offers LAN (over-network/WiFi) printing, and a built-in camera so you can monitor larger projects remotely, and easily pause or cancel them if something goes awry.  

Perhaps it's best feature is true auto-leveling. Unlike my other printers, which I level manually, continually making sure each corner of the printing surface is perfectly level -to a paper-thin threshold -with screw knobs, the K1 Max uses a laser beam fixed to the extruder to perfectly re-level itself before each print. 

Adhesion & Support This was obvious even as a novice printer. Without bed adhesion, glue, a textured build-plate or a brim around the bottom edges of your print, you could see corners of your print warping, or even the whole model slide off the surface. And, supports are often necessary with large over-hangs which will collapse if there's not a temporary support structure holding it in place. 

Basic slicing software, such as Creality Print and Cura UltiMaker, will alert you if there's a danger of an over-hang collapsing or an adhesion issue, then add the recommended accommodations, but often these standard recommended support and adhesion tools ruin the quality of the print itself. For example, an adhesive brim may not totally tear away after printing, leaving unsightly plastic burring from the bottom edges of your model, and some supports leave marks after being removed, or worse, are so stuck on the model, they break it when detached. Sometimes these safety features are so over-done, it's worth risking a failed or collapsed print just to go without them. 

However, with more experience on the slicing software, there are details I've become more accustomed to "fine-tuning." For example, you can adjust the spacing and perforation connecting the superfluous support and adhesion structures so they still hold the print safely, but remove easier with minimal scaring to the details of the actual model. After more time printing, I often dispense with the standard settings, and set my own preferences as I know more precisely how well my printers hold certain over-hangs, and how well certain sizes and shapes stick to the build plate. Often, zero or minimal superfluous structures are needed, but it took some time before I became confident abandoning the standard settings which are there for good reason. 


Cooling A good cooling fan, and well programed "slice" or .gcode file, which tells the printer how exactly to print your shape or model, are important parts of the process. Just about every SLA printer will have a model fan which cools the model and the extruder nozzle throughout the print. Using the advanced settings, you can choose when, during your print, to employ the fan for the best result. Basic settings will engage the fan once the nozzle gets to a certain temperature. But, when slicing, you can also choose to employ the fan at critical points such as when the print handles overhangs. This way unsupported filament gets "frozen" in place, rather than melting downward when there's nothing beneath it. You can also employ the fan after the first few layers of a print, so it holds in-place steadily before continuing onto subsequent layers.    

Ironing & Z-seam positioning One inescapable reality of 3D printing, is the noticeable texture of prints compared to conventional manufacturing. SLA printing is done in layers, leaving a visible, lined texture throughout most prints, and a seam where the printer stops one stream of filament and adds another. In many cases these tell-tale signs of a 3D print are subtle, and sometimes add character to the print, but when it's important for the product to have a smooth seamless surface, your slicer application has ironing and seam-hiding options to program into your model's gcode. 

Ironing, as the name suggests, is just like a clothing iron. It's essentially a finishing option where the heated nozzle will go over the top or all visible layers of the model one or more times without extruding filament in order to smooth the final product. The quality on the ironing job will depend on the quality of the printer as well as the material and color you're using. For example, a graded, silky color may not look as good flattened as it does printed naturally, and certain types of material, like darker ABS colors are prone to show signs of swirling, melt lines, where the ironing takes place. So like other advanced settings, it's best to try different tests with each print to get the best result.

Additionally, most slicers will allow you to position the Z-seam -the visible line along which the nozzle stops and reverses direction- on the back of a model or even at a natural angled corner so it's not as visible. You can also stagger the reverse positions on each layer, so there is no single seam. However, sometimes this stagger can result in bumps or blemishes as the seam starts and ends at various points along the print, rather than hidden along one edge. 

There is no perfect finish-type for all prints and models, and many people will still sand, paint and polish their models post-print to get it just right. 

Stay tuned for future editions of the Fabrication Lab where I'll cover more topics, including a review of the Creality K1 Max and Ender 3; an article on using third-party upgraded parts for the Ender 3, including an all new MicroSwiss replacement extruder, and a deep dive into CAD modeling on Rhinoceros software and creating a new stl file from scratch. I'll also post some of my very own 3D designs made with Rhino 8.  

Tuesday, August 29, 2023

3D Printing: The art of slicing

As I continue to pursue my 3D-printing hobby, I'm finding that I've improved my pre-build design work. Even on the standard, free Creality Slicer application that came with my entry-level machine, I've found I can really begin tailoring pre-existing designs I've found online, as well as creating my own unique models. 

Layout of the Sliced Dodge Charger Design
Experienced 3D printers will know this, but "slicing" is (in basic terms) the word for programing a digital design so your printer can build it, level-by-level. The free slicing software offered with my modest machine lacks many of the more advanced tools an expert may want to design a serious product: either to sell or use for a complex task... a drone for example.

When I first began creating 3D prints, I stuck with free pre-designed files I could download from sites like Thingverse and Cults 3D. These sites provide open-source models offered by generous users who simply want to share their work with others. You simply create an account, download the 3D file you'd like to build and stick your new file in the machine. The next thing you know, your printer is building a replica of the Colosseum or the Space Shuttle. 

The top, front, of the Challenger
However, as I advanced in my hobby, I realized I needed to be able to customize, or even create, designs from scratch. If I'm going to build a robot or a satellite, I'll need to begin learning how to create my own model; then edit and improve on it from the first built prototype: enter the 1970 Dodge Challenger model.  

There are not too many of these babies on the road anymore, in part because 1970's American muscle cars, and the people who loved to drive them, were (to put it lightly) a bit high-strung. Just watch Vanishing Point (1971), for an example. That's Exactly why I wanted to add the Challenger to my (little) car collection ;)

Anyway, I looked at a few pre-made designs for the old Challenger on the Internet as well as numerous photos of the famed car, and got to work. I originally tried a small-sized version -about the size of a Hot Wheels (do they still have Hot Wheels?). It came out okay, but it was a bit disappointing. Details such as the mirrors, headlights, back mufflers, etc. either didn't come out, or broke off very easily. The big problem was that my modest machine has a very small build-plate, and limited area to create a bigger, more complex models. 

The print
My solution was to create a larger model, but in two different pieces. This way, I could create a nice big car even with the limited space I had. To do this, I flipped the car in my design vertically, with the back of the car on the bottom, and the top of the car on top. In doing this, the software understands that you're only making one half of the model in one build, and you can still save the other half to build later. Once you're finished, you can either glue both sides together, or program notches in the model so they snap in place. Pretty cool. 

I'm still very much a learner when it comes to 3D printing. Both my machine, and the free Creality Slicer application I use are entry-level. However, I have experimented with some much more complex SAAS paid applications which allow users to make much more complicated designs. 

SelfCAD is a great web-based system that you can use to basically make anything; plus it's very reasonably priced... However, these types of systems require a bit of expertise. So, the amateur -like myself-, may want to consider the cost before going further than the basic slicing software.          

Saturday, June 10, 2023

3D Printing: How to make anything

I've recently gotten into 3D printing, one of the newest fads. I'm not sure if it will catch on, or not. But I suspect it's here to stay. The process is pretty simple, you buy a box-type structure, or machine, with a fairly simple interface, and then it starts building things (literally anything you want). 

The way the machine works is by melting a spool of "filament", a.k.a. plastic and laying it out on a heated pad per specific guidelines you program into it. Those guidelines could be for a laundry machine part (so you don't have to buy it yourself), or a mini Romulan Warbird from the old Star Trek series. Recently, I built a little model of the Hagia Sophia in Istanbul -just because I like it, and because I've never had the ability to see it in real-life. 

3D Printed Hagia Sophia

The process is not new. It's been around, and used to be called "additive manufacturing"; meaning that we're not taking a big chunk of material and sculpting it or molding it (leaving a lot of it to waist), we're only using exactly the amount of material needed to make the perfect object with nothing left-over -really cool idea! 

The specific printer I bought was a Creality brand printer. It cost fewer than $300 USD. It's an older model and has some minor issues, but generally it's f%#king great once you get used to it. I wouldn't recommend paying SO much if you're a first-time user. And, I'll stick with my current machine as long as it lasts. However, If I were to buy a new one in the future, I'd likely get THIS ONE. It's available on Amazon for (at this time) for roughly $600 USD. 

There are many pitfalls in 3D printing, all of which I won't get into -you often end up with a horrific cluster of molten plastic that looks like The Thing instead of what you wanted to make. But the basic rules are to make sure to level your build-plate, ensuring that it is perfectly, 100 percent upright before printing. AND, to ensure the temperature of both the build-plate and nozzle are set to the correct temperature for the type of material you're using: PLA (Polylactic acid), ABS (Acrylonitrile butadiene styrene and Polylactic acid). 

Also, don't eat or drink from stuff made from PLA for some reason. Use a regular plate; I'd recommend buying it from TARGET!   


Popular Items